Blogspot, a popular blogging platform by Google, has facilitated countless individuals in expressing their ideas, sharing their expertise, and interacting with their audience. While it is widely appreciated for its user-friendly interface, there might be times where you need to change the admin email associated with your account. Today, we’re here to simplify exactly that process – with a comprehensive guide on how to change your Blogspot admin email to another Gmail.
Reasons to Change Your Blog Email:
Before we delve into the procedure, let's understand why you might need to change your email. Maybe your current email account is compromised, you’re planning to transfer your blog to someone else, or perhaps, it's simply about streamlining your digital life by assigning each email account to specific roles. No matter the reason, changing your Blog account email to another Gmail is quite straight forward.
Step-by-Step Guide:
Note: You can see the Video Tutorial on How to change admin in blogspot here.
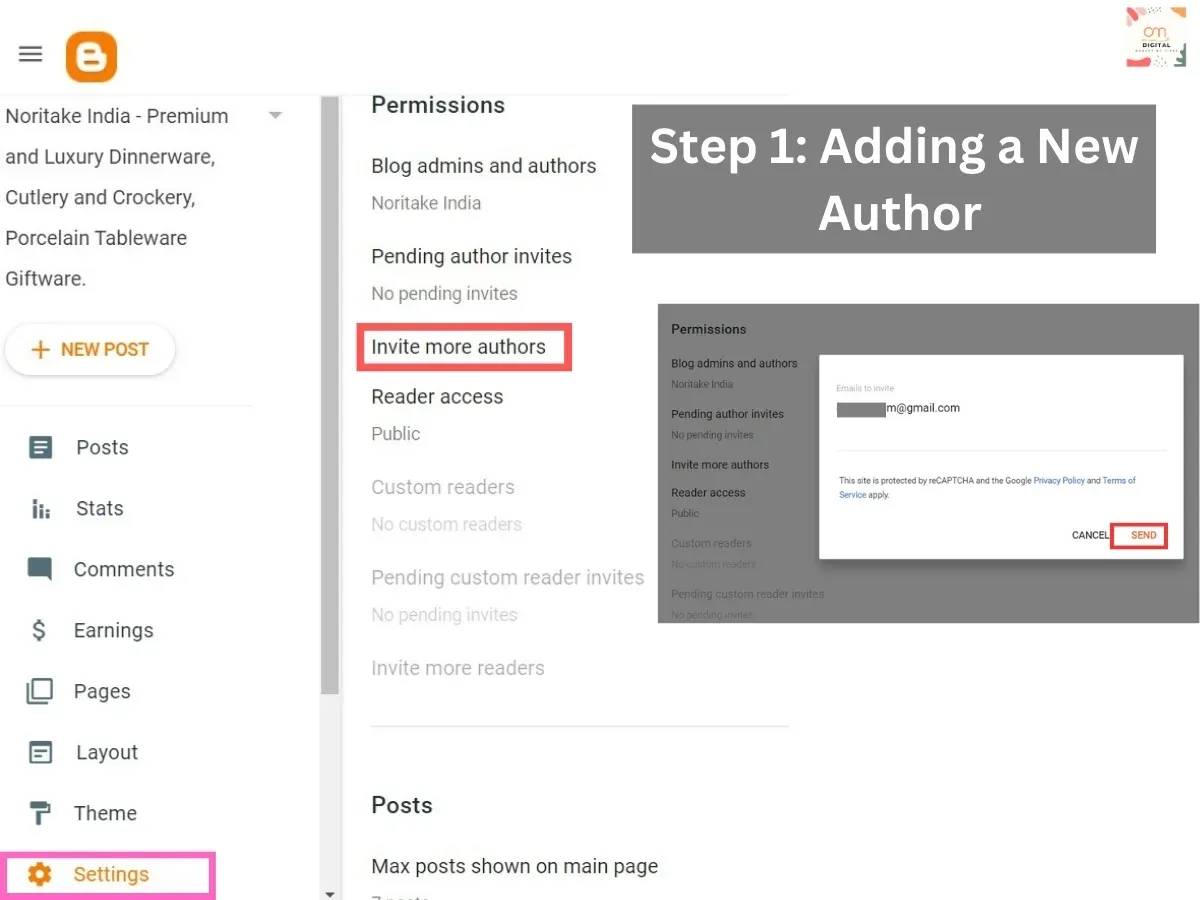
From your Blogspot dashboard, navigate to
'Settings' > 'Basic' > 'Permissions.' Here, click on 'Invite More
Authors' and enter the Gmail address you would like to transfer the blog to. An
invitation to join as an author will be sent to this Gmail.
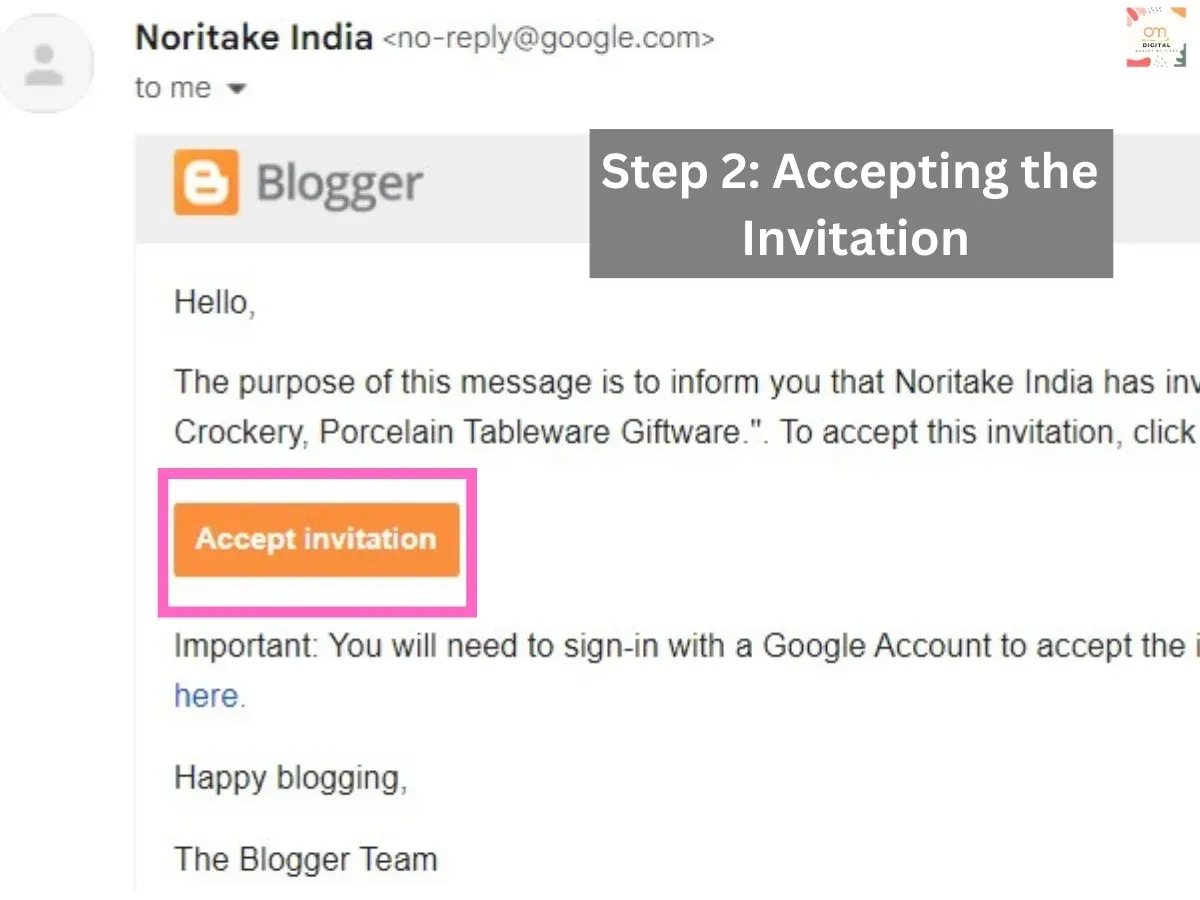
Log in to the provided Gmail. Check
the inbox for an invitation from Blogspot. In the email, click 'Accept
Invitation' to start your journey as a new author for the blog.
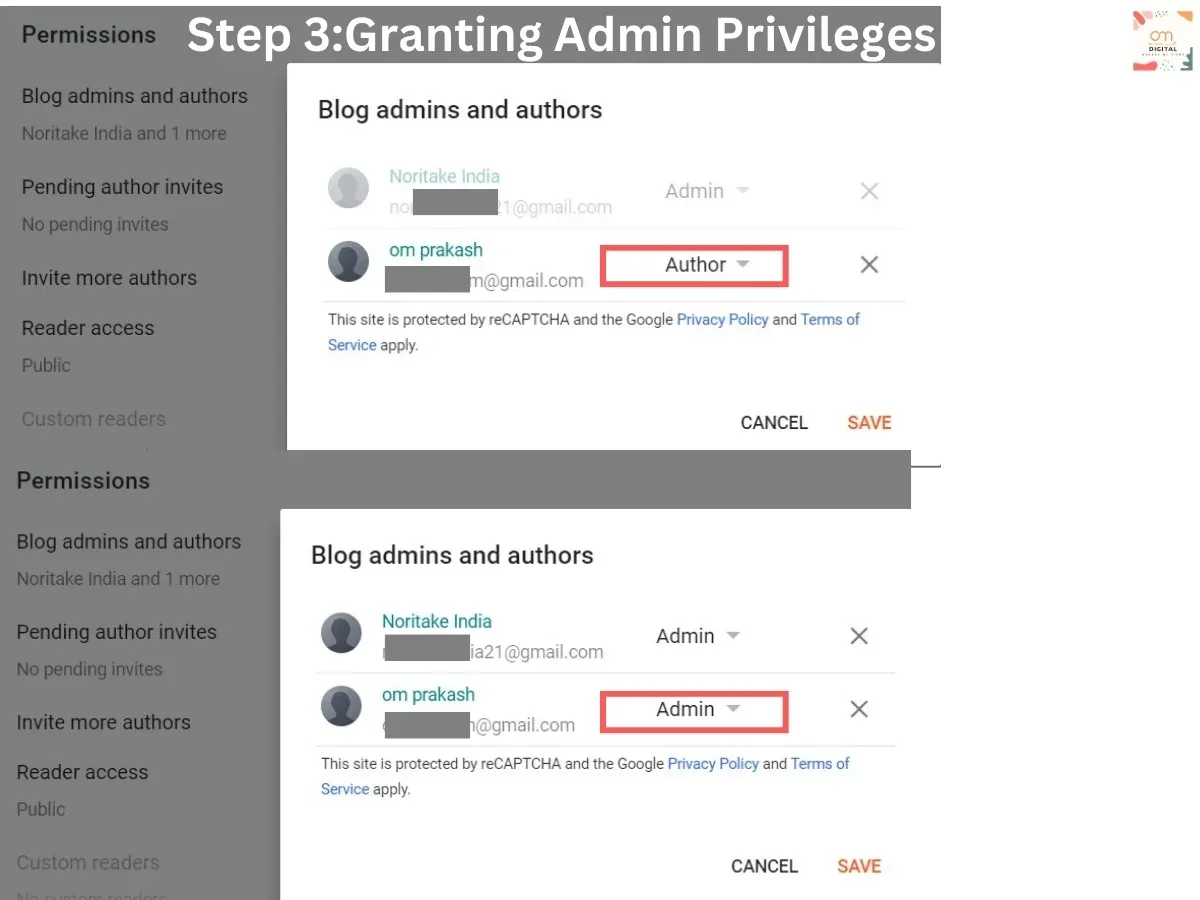
Now, switch back to the original Gmail account
- your current Blog admin account. Under 'Permissions,' you'll see the new
Gmail address listed as an author. Next to it, click 'Admin' to grant privileges to the new Gmail account.
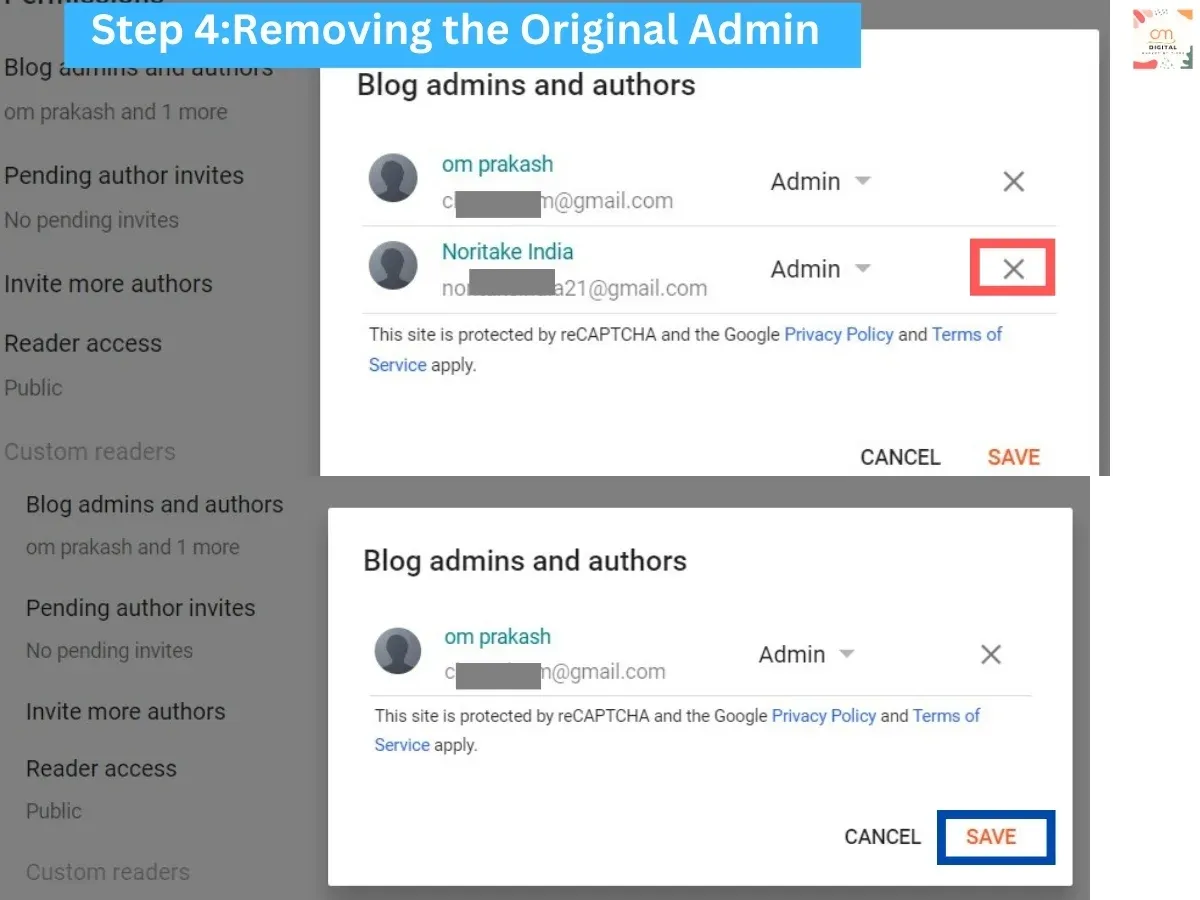
Log into your Blog with the new Gmail.
Navigate back to 'Settings' > 'Basic' > 'Permissions,' find the original
Gmail, and click the 'Remove' option next to it. Confirm the action in the
prompt message.
Upon completion of these steps, the new email will have full control over the blog, officially becoming the new
admin. Note that the original email account won’t have access to the Blogspot dashboard or blog settings anymore.
Conclusion
Switching your Blog account from one email to another isn't a daunting task. Just follow this easy step-by-step
guide, and you’ll be able to transfer admin rights effectively. Whether you're
changing roles or improving security, this guide ensures you accomplish your
goal without any hiccups. Remember, with a simple process like this, managing
your digital world on your blog is increasingly intuitive and flexible.


0 Comments